Mobile Phone Accelerometer Controlled Robot Using RPi
Let us build a robot using Raspberry Pi which can be remotely controlled by a mobile phone accelerometer. What We are Looking At About Raspberry Pi This tiny computer is a precious tool for students, artists,…
What We are Looking At
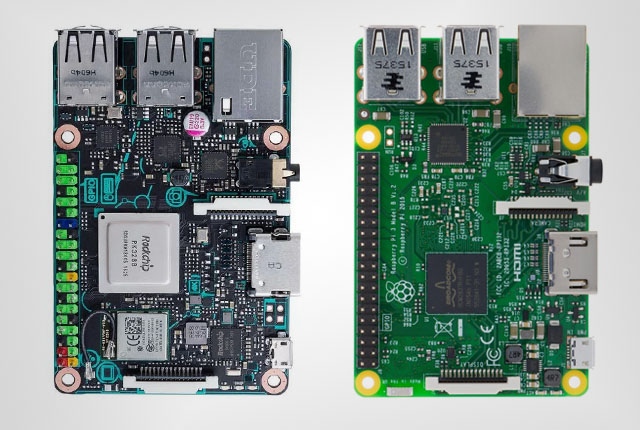
About Raspberry Pi
This tiny computer is a precious tool for students, artists, and of course hobbyists and hackers. With features for developing things in different areas, it is not a surprise to have hundreds of thousands if not millions of users.
Pi and Python
Python is a wonderful and powerful programming language that’s easy to use (easy to read and write) and with Raspberry Pi lets you connect your project to the real world. Python syntax is very clean, with an emphasis on readability and uses standard English keywords.[AdSense-C]
Physical computing is one of the most engaging activities, and it’s at the heart of most projects we see in the community. From flashing lights to IoT smart homes, the Pi’s GPIO pins make programming objects in the real world accessible to everybody.
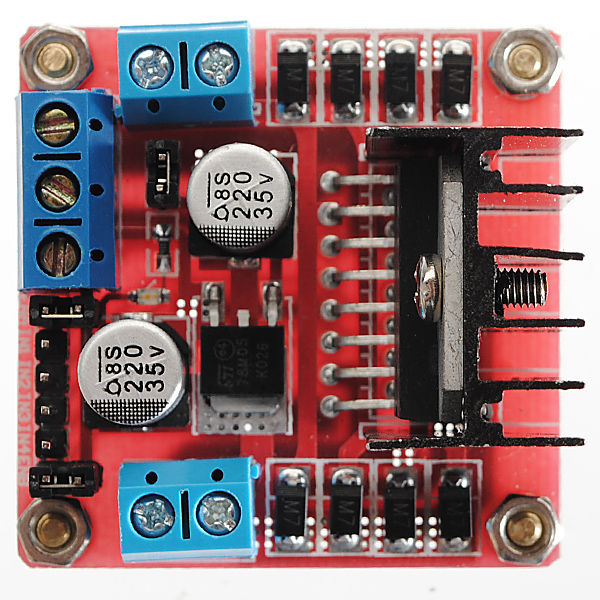
The H Bridge
An H bridge is an electronic circuit that enables a voltage to be applied across a load in either direction. These circuits are often used in robotics and other applications to allow DC motors to run forwards or backwards. Most DC-to-AC converters (power inverters), most AC/AC converters, the DC-to-DC push–pull converter, most motor controllers, and many other kinds of power electronics use H bridges. In particular, a bipolar stepper motor is almost invariably driven by a motor controller containing two H bridges.
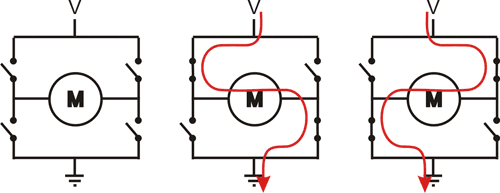
A DC motor has two terminals. When we apply a potential difference across the two, it will rotate in one direction. If we reverse the polarity, it will rotate in anticlockwise direction. To reverse a DC motor, you need to be able to reverse the direction of the current in the motor. The easiest way to do this is using an H-bridge circuit. There are many different models and brands of H-Bridge. This tutorial uses one of the most basic, a Texas Instruments L293NE.
Here, I will give you a basic idea on how to setup things. The rest is up to you. Everything is limited by your imagination only.

Setup a Chasis
Build a chasis, whichever design you like, that have enough space to carry our Raspberry Pi, Motor Driver Board, Regulator Circuit and the Lithium Polymer Battery. You can use either Foam Board Base or Aluminum Base.
The Regulator
The power input for Raspberry Pi and working for L298N internal circuit is 5V and the voltage needed for driving the motor is 11 V (up to 32 V). And so we have to make sure that the voltage we are providing the Raspberry Pi is not more than 5.5 V. Otherwise it may burn the board.
Network
In this project I will be using WiFi connection to control this robot. In Raspberry Pi You can use any OS that supports Python GPIO library. I am using Kali Linux. But for beginners, I recommend Raspbian OS.[AdSense-A]
Once you install everything, you have to setup network connection. In Raspberry Pi 3 there is an inbuilt Broadcom WiFi Adapter. If you are using previous versions, you will have to connect an external USB WiFi adapter. Connect the Pi to your network. It is better to provide a static IP address for the Pi. Next you will have to enable and setup SSH on your Pi. Test your connection by connecting to your Raspberry Pi from another device.
GPIO
Make sure that the GPIO library is installed and run a simple code to test like blinking LED.
Sensor UDP
Sensor UDP is an app that is available in the Play Store. This app allows you to stream real time sensor readings to a remote host; in our case, the remote host is the Raspberry Pi. Go ahead and download it. After downloading open the app, set the destination port and host. Take note of this port as we will be using this port for setting up the Python listener.
The Python Listener
Using Python language, we will have to setup a listener script on Pi using Python that will help us to listen to the incoming packets and read the sensor values.[AdSense-B]Set the correct port number and we are set to go.
Have a look at my code
import RPi.GPIO as GPIO ## Import GPIO library
import socket
import csv

GPIO.setwarnings(False)

GPIO.setmode(GPIO.BOARD)
GPIO.setup(33,GPIO.OUT)
GPIO.setup(11,GPIO.OUT)

GPIO.setup(13,GPIO.OUT)
GPIO.setup(15,GPIO.OUT)

GPIO.setup(29,GPIO.OUT)
GPIO.setup(31,GPIO.OUT)


GPIO.output(29,True)
GPIO.output(31,True)


UDP_IP = "0.0.0.0"
UDP_PORT = 5050

sock = socket.socket(socket.AF_INET, # Internet
                     socket.SOCK_DGRAM) # UDP
sock.bind((UDP_IP, UDP_PORT))

while True:
    data, addr = sock.recvfrom(1024)
    raw=data
    #print raw
    limited=raw.split(",")
    x=float(limited[3])
    y=float(limited[4])
    #print int(x), int(y)

    if int(x) >= 3 and -3<int(y)<3:
       print "FORWARD"
       GPIO.output(33,True)
       GPIO.output(11,False)
       GPIO.output(13,True)
       GPIO.output(15,False)

    elif int(x) <= -3  and -3<int(y)<3:
       print "BACKWARD"
       GPIO.output(33,False)
       GPIO.output(11,True)
       GPIO.output(13,False)
       GPIO.output(15,True)

    elif int(y) >= 3 and -3<int(x)<3:
        print "LEFT"
 GPIO.output(33,False)
        GPIO.output(11,True)
        GPIO.output(13,True)
        GPIO.output(15,False)

    elif int(y) <= -3 and -3<int(x)<3:
        print "RIGHT"
 GPIO.output(33,True)
        GPIO.output(11,False)
        GPIO.output(13,False)
        GPIO.output(15,True)


    else:
        print "STOP"
 GPIO.output(33,False)
 GPIO.output(11,False)
 GPIO.output(13,False)
 GPIO.output(15,False)
Roll Out
Next thing to do is driving the motor. Each L293N IC can drive two motors independently. Configure 4 pins (or 6 pins if enable pins are counted) as output pins. Give appropriate output signals to the Motor Driver board and make sure that the enable pins of the driver board is active high. Otherwise it wont work.


Great post, Your post is an excellent example of why I keep coming back to read your excellent quality commentary….