Why JacDac Smart Kit is the Perfect micro:bit Companion | Unboxing & Hands-On Demo
Exploring the world of electronics can be exciting, whether you are just beginning your journey or already experienced with hands-on projects. Finding the right tools that make learning both simple and engaging is essential for building confidence and skills. The JacDac Smart Exploration Kit from Elecfreaks, designed specifically for the micro:bit V2, is an excellent example of such a tool.

Far more than a basic collection of sensors, this kit is a thoughtfully designed educational resource that encourages curiosity and helps learners develop a solid understanding of electronics, coding, and automation.
Here, we will explore why this kit is a perfect addition to any maker’s workbench and how it makes learning accessible and enjoyable for all levels. I’m always searching for tools that make learning electronics simple, fun, and hassle-free. The JacDac Smart Exploration Kit from Elecfreaks, designed for micro:bit V2, ticks all those boxes and more.
What Makes This Kit Special?
At the heart of this kit is JacDac technology—Joint Asynchronous Communications Device Access, developed by Microsoft. What does this mean for you? Simple: plug-and-play simplicity with real-time data simulation.

- No complex setup: connect a module and it instantly shows up in Microsoft MakeCode.
- No wrong connections: reversible connectors eliminate wiring mistakes.
- No tedious coding just to get started: the system detects your sensors automatically.
This is exactly what every beginner needs—less time debugging, more time learning and building fun projects!
What’s Inside the Box – Unboxing the JacDac Kit
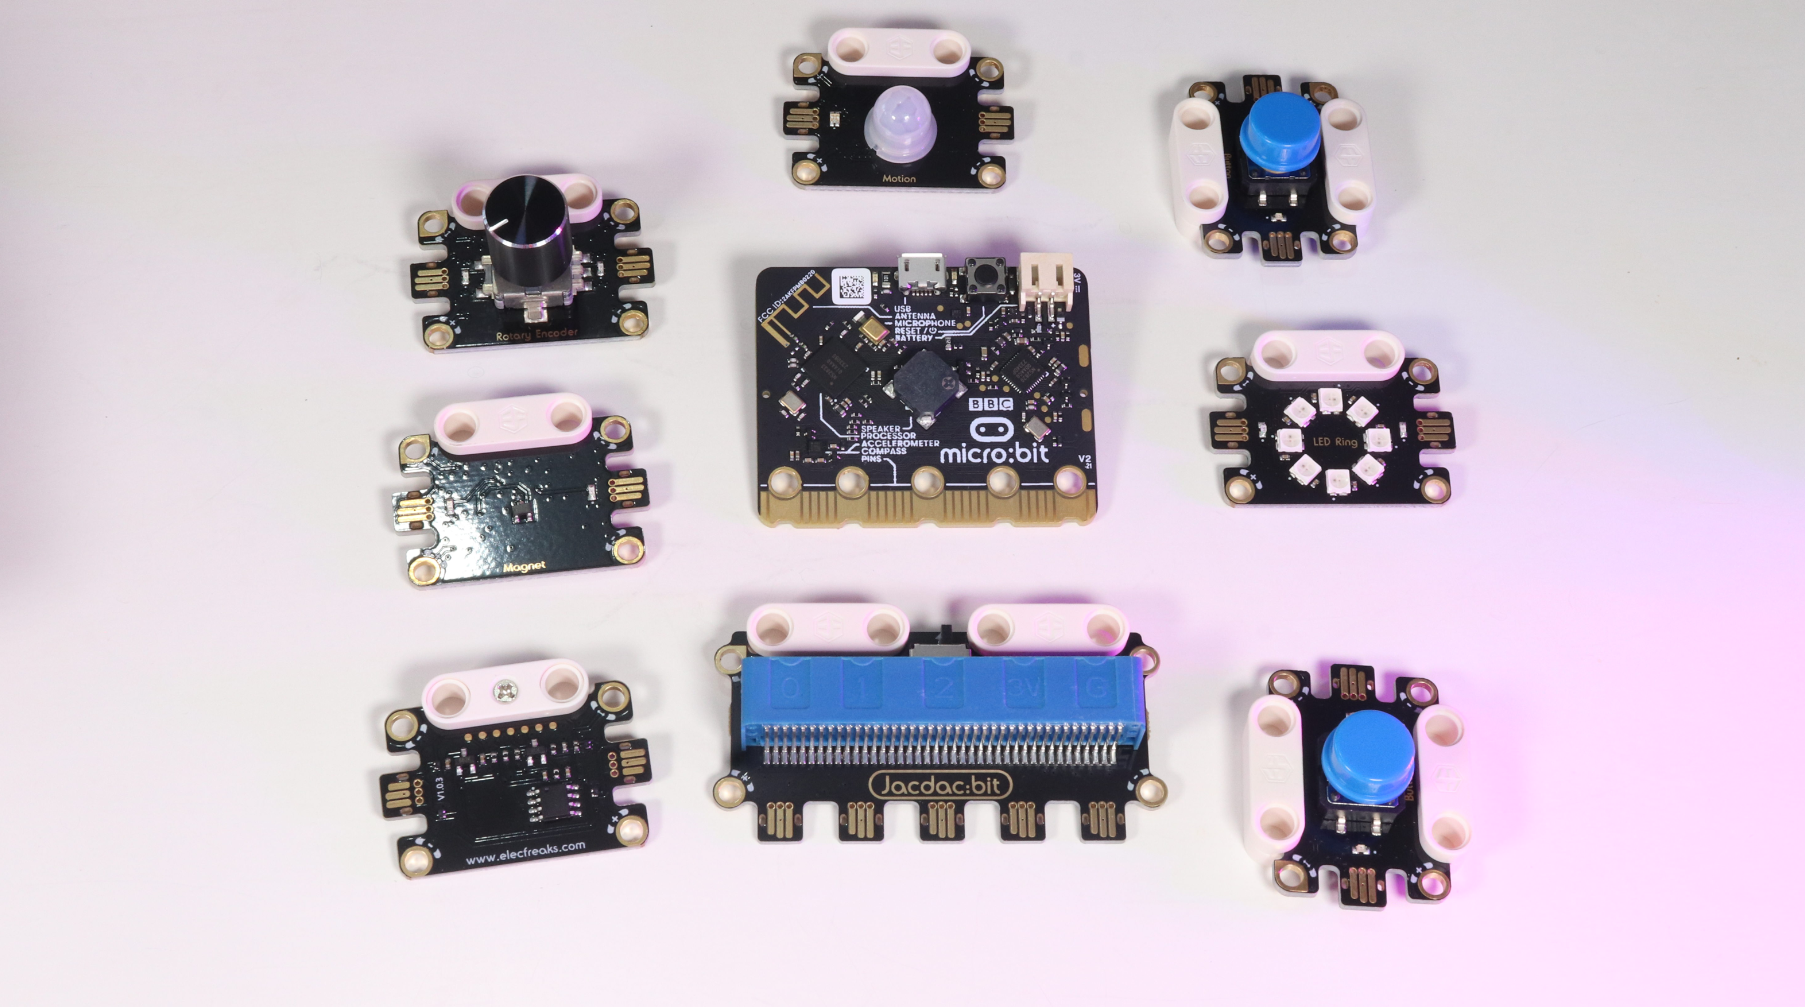
When you unbox the JacDac Smart Exploration Kit, here’s what you’ll find:
- 1× JacDac Expansion Board
- 1× Button Module
- 1× Light Sensor
- 1× PIR (Human IR Motion) Sensor
- 1× Magnetic Sensor
- 1× Rotary Encoder (Knob)
- 1× RGB LED Ring (8 LEDs)
- 2× JacDac Cables (10cm & 25cm)
- 1× USB Cable
- Access to 10 ready-made project tutorials on the Elecfreaks Wiki

Everything is neatly packed, clearly labeled, and built with a focus on ease of use and durability.
Why It’s Beginner-Friendly!
Unlike traditional electronics kits that require breadboarding, soldering, and hours of setup, JacDac is completely plug-and-play. Within minutes, you can go from unboxing to building real-world projects.

- No soldering, no jumper wires
- Fast setup: great for workshops, classrooms, or weekend tinkering
- LEGO-compatible & supports 3D printing and wood-based projects
For seasoned makers, it means faster prototyping and quick validation of ideas.
Quick Look at the Sensors
JacDac Expansion Board
The JacDac Expansion Board serves as the main control hub of the kit. This is where you plug in your micro:bit V2, and it provides multiple JacDac ports for connecting all your different sensors and modules. What makes it special is the plug-and-play functionality—as soon as you connect a sensor, it’s automatically detected by the MakeCode environment without needing to modify wiring or code. This board also ensures stable power distribution to all connected devices, making your projects neat, organized, and hassle-free.
Button Module
The Button Module is a simple yet powerful input device that detects basic ON/OFF presses. Whenever you press the button, it sends a binary signal (0 for not pressed, 1 for pressed) directly to the micro:bit. It’s perfect for creating quick interaction features like triggering a game, controlling a counter, or initiating random number generation—ideal for kids learning cause-and-effect programming.

Rotary Encoder (Knob)
The Rotary Encoder, also called the knob, helps you measure both the direction and angle of rotation. You can twist it clockwise or counterclockwise, and your micro:bit will detect the rotation, giving you real-time numerical feedback. This is great for building interactive interfaces like volume controls, speed dials, or even menu navigators for your micro:bit projects, providing a hands-on feel to digital interactions.
PIR Motion Sensor
The PIR Motion Sensor detects human presence by sensing infrared radiation, which is naturally emitted by warm bodies like people. When someone moves in front of the sensor, it triggers an event in your program—ideal for creating motion alarms, automatic lights, or even simple security systems. It’s a fantastic way to introduce children to the concept of motion detection technology used in real-world devices.
Light Sensor
The Light Sensor is designed to measure the brightness of the environment by capturing ambient light levels. It converts the light intensity into numerical values that your micro:bit can easily read and act upon. This allows you to make projects like automatic night lights, sunlight detectors, or even brightness-based alarms, teaching kids about how machines can sense and react to environmental changes.
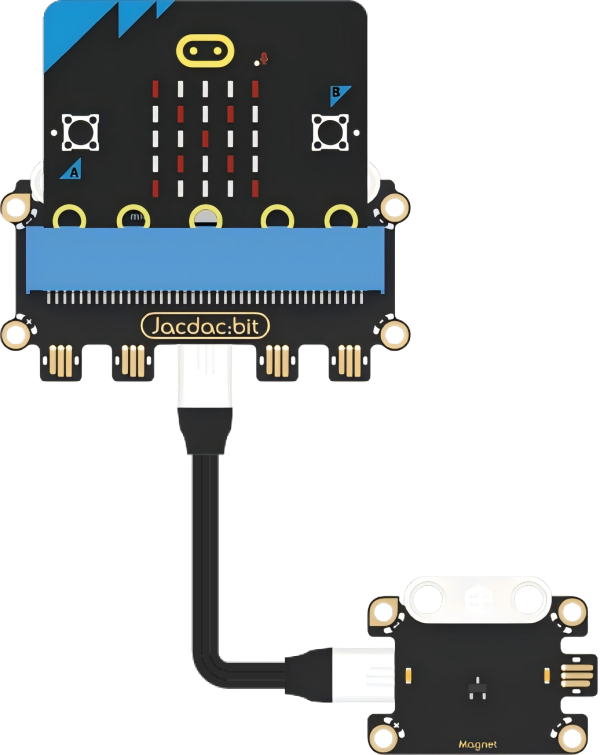
Magnetic Sensor
The Magnetic Sensor picks up the presence of magnetic fields, meaning it can detect when a magnet is nearby. It’s especially useful for creating hidden triggers, like a secret door opener or a magnetic switch-based alarm system. This sensor is great for showing kids how invisible forces like magnetism can be harnessed in fun and useful ways within electronics projects.
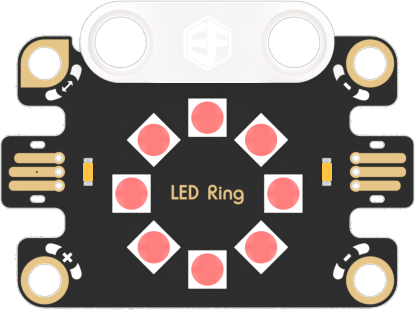
RGB LED Ring
The RGB LED Ring comes with 8 individually controllable LEDs, allowing you to display colorful patterns, effects, and notifications. You can program it to change colors, blink, fade, or respond to sensor inputs—for example, turning red during motion detection or green after pressing a button. It’s a great visual output module that makes your projects vibrant and interactive, and introduces kids to creative visual programming.
Setting Up – From Box to Project in Minutes
- Plug your micro:bit into the JacDac Expansion Board.
- Connect any sensor using JacDac cables.
- Open Microsoft MakeCode, go to Extensions > Search ‘JacDac’ > Add.
- Plug in your module and it appears instantly on your screen!
No drivers, no complicated setups—just fun electronics learning.
Sample Projects You Can Build
Here are a few exciting beginner projects to try right away:
Project 1 – Button Game
Create a simple yet fun “compare your luck” game using the button sensor. First, plug the micro:bit into the Jacdac Expansion Board and connect the button module via a 10 cm Jacdac cable. In MakeCode, add the “Jacdac” extension and drag in the “on button pressed” block for your specific button sensor. Inside it, use the “pick random” block (1–6) and display the result on the LED screen. Once downloaded to the micro:bit, pressing the button will show a random number — perfect for number-guessing games or making quick decisions with friends wiki.elecfreaks.com+3wiki.elecfreaks.com+3wiki.elecfreaks.com+3.
Next, enhance the experience—add a sound effect, fade effect, or animation when the number appears to make it more engaging. You can also compare numbers: after two presses, show “>”, “<”, or “=” to indicate which player got the higher roll. Encourage viewers to challenge their siblings or classmates and celebrate the outcome.
Finally, prompt your audience to experiment further—“What happens if we change the range to 1–20?” or “Could we combine it with a buzzer or LED ring?” This shows how easy it is to extend basic logic to more complex interactions, reinforcing both coding skills and creativity.
Project 2 – Magnetic Agent
Use the magnetic sensor to detect nearby magnets and trigger visual and audio feedback. Start with the standard setup: micro:bit on the expansion board and magnetic sensor attached with a Jacdac cable. In MakeCode, add “on magnetic changes” or “on magnetic detected” block, and inside it display a checkmark icon and play a tone. Also include an “else” path for when no magnetic field is present—display an “X” icon instead wiki.elecfreaks.com.
Run the program and bring a magnet close to the sensor — a big green “✔️” appears and a beep sounds, indicating detection. Remove the magnet and the display flips to an “❌”. Perfect for a hidden object detector or a door proximity sensor—demonstrate how closing a hidden door could trigger an alert.
Encourage customization: change the tone, create longer detection intervals, or add color feedback using the RGB LED ring. You can even challenge viewers—“Can you distinguish north vs south pole with the sensor?”—to promote experimentation and discovery.
Project 3 – Motion Alarm
Build a motion-activated alert system using the PIR human infrared sensor and the LED ring. Begin by wiring the micro:bit to the PIR sensor and the RGB LED ring on two separate Jacdac ports. In MakeCode, include the “on human motion detected” block; inside, set all LEDs on the ring to red, play a warning tone, pause for a moment, then clear the lights. Add a loop timer or reset to allow for repeated detection wiki.elecfreaks.comwiki.elecfreaks.com+4wiki.elecfreaks.com+4wiki.elecfreaks.com+4.
Demonstrate the alarm in action: walk in front of the sensor and watch the entire ring glow red and hear the alert tone. Explain how this could be the basis for a kid-friendly security system or a fun “intruder alert” for secret rooms.
To extend the project, consider adding a countdown, flashing patterns, or Bluetooth notifications. Challenge your audience: “Could you make the ring flash blue if someone left the room?” This exercise strengthens understanding of loops, sensors, and event-driven programming.

Each project comes with step-by-step tutorials on the Elecfreaks Wiki, making it ideal for both self-learners and classroom environments.
A Must-Have for Every Maker
Whether you’re a parent introducing your child to STEM, a teacher running coding workshops, or a maker prototyping creative ideas, the JacDac Smart Exploration Kit makes electronics fun, accessible, and frustration-free.
It cuts down on setup time, eliminates beginner hurdles, and allows you to focus on hands-on learning and creativity. Highly recommended for anyone who wants to make electronics and coding simple yet powerful.