Make Your Own VPN Server | PPTP Server and Client Setup
You may know what a VPN, or Virtual Private Network, is; you probably don’t use one. You really should be using a VPN, and even if you don’t think so now, at some point in the future you may consider it as important as your internet connection.
In this post, I will explain what a VPN is and will show you how to setup your own PPTP Server and Client in Linux.
Virtual Private Network, or VPN, is a group of computers connected together over a public network ie the internet. We can use VPN to connect our machine to a remote network and access files and information stored in a machine in that remote network. The connection will be encrypted. So a third person wont be able to see.
In my case I have a private network in my home and have setup a PPTP VPN server in my Raspberry Pi. So if I need to connect to my PC from my office, I can use this VPN to connect to my home network, from the office network and access my PC.
There are various types of VPNs available.
PPTP is one of the simple and commonly used VPN. It can be simply setup on every major OS. PPTP tunnels a point-to-point connection over the internet maintaining privacy. Even though the PPTP is strong, it is not the most secure VPN available.
Installation
Watch This Tutorial To Simplify the Installation Process
Server Setup
Now I will show you how to setup a pptp server in linux. I am using Kali Linux for setting up VPN server.
We have to install some packages and edit some configuration files. Just copy and paste it in the terminal in the order.
First do an update by typing
sudo apt-get update
then install pptp
sudo apt-get install pptpd server
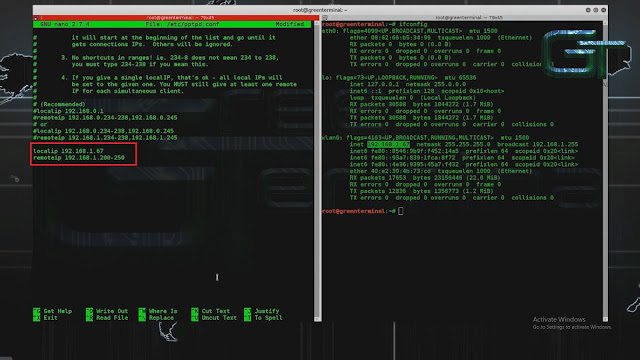
Now Edit the “/etc/pptpd.conf” configuration file:
sudo nano /etc/pptpd.conf
Add to it:
localip 192.168.1.67
remoteip 192.168.1.200-250
Here the “localip” is the private IP address of the server, and the remoteip are the addresses that will be given to the clients, when they connect to this VPN server.
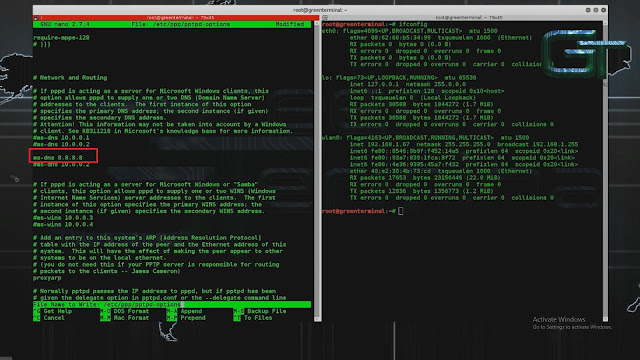
Now Edit the “/etc/ppp/pptpd-options” configuration file:
sudo nano /etc/ppp/pptpd-options
Append to the end of the file, the following directives:
ms-dns 8.8.8.8
Where the IP used for the ms-dns directive is the DNS server for the local network your client will be connecting to.
Edit the chap secrets file:
sudo nano /etc/ppp/chap-secrets
Add to it the authentication credentials for a user’s connection, in the following syntax:
greenterminal pptpd password123 *
Restart the connection’s daemon for the settings to take affect:
sudo service pptpd restart
sudo service pptpd status
Edit the “sysctl” file:
sudo nano /etc/sysctl.conf
Find the “net.ipv4.ip_forward” line and change the parameter from 0 (disabled) to 1 (enabled):
net.ipv4.ip_forward=1
You can either restart the system or issue this command for the setting to take affect:
sudo sysctl -p
Port Forwarding
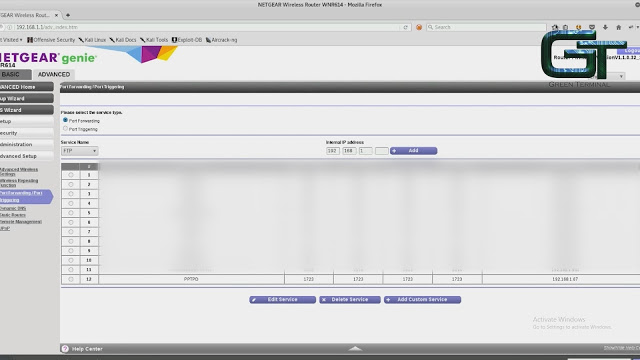
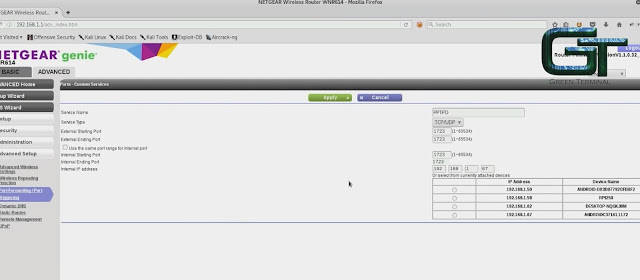
Next we have to setup port forwarding in router. This will be different for different routers. I am using netgear WNR 614.
PPTP VPN uses port no 1723. So we just have to point all the incoming connections in that port to the VPN servers Private IP address.
Ok the server side is now done.
Client Setup
Next we will configure the client OS. I am using windows 10.
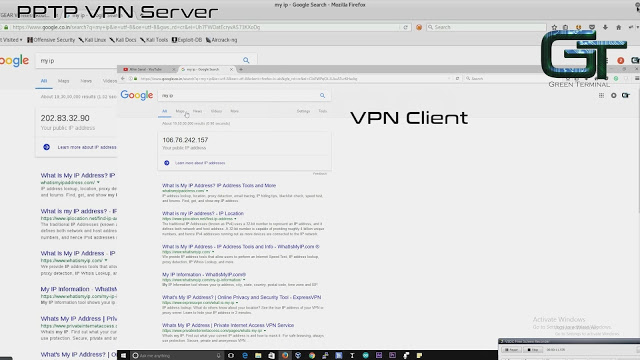
Before starting we will check the Public IP address of the client machine and server machine.
Here we can see that both are different IP address. When we connect to VPN server successfully, this public IP will change.
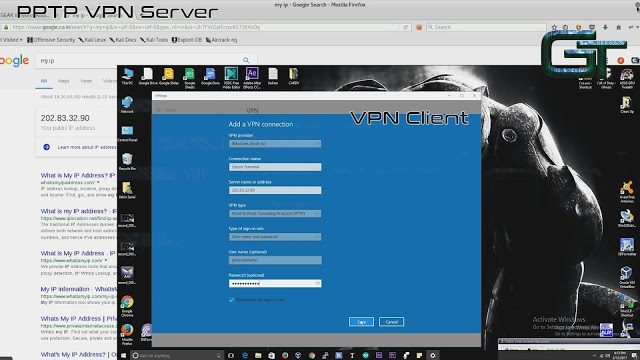
Now lets go to the VPN setup.
Enter the public IP address of the server, the username and password we just set up in the server. then click Connect.
Take a new tab and check the current public IP address.
We can see that the public IP address in the client has changed to VPN servers Public IP. This means that all the traffic is now going through the VPN server.
Now I have direct access to all the devices in that network.
Dont forget to subscribe my youtube channel. Just Click Here View My youtube channel and Click Subscribe. Or visit my Facebook Page.

