The Baby Beast – Digispark
As hobbyists, we surely know the importance of arduino boards in electronic. Arduino UNO, mega, nano, micro are a few of them. Arduino is really easy to code, upload and integrate into projects. They all have so many GPIO pins which can be used to connect multiple sensors and get various output; serial and/or parallel.
But when we are doing simple projects most of the GPIO pins will be left unused. What if we don’t want that much IO pins. What if we could get a smaller board with less number of IO pins, less power consumption and easy to program.
Behold… The DIGISPARK!!
What is Digispark?
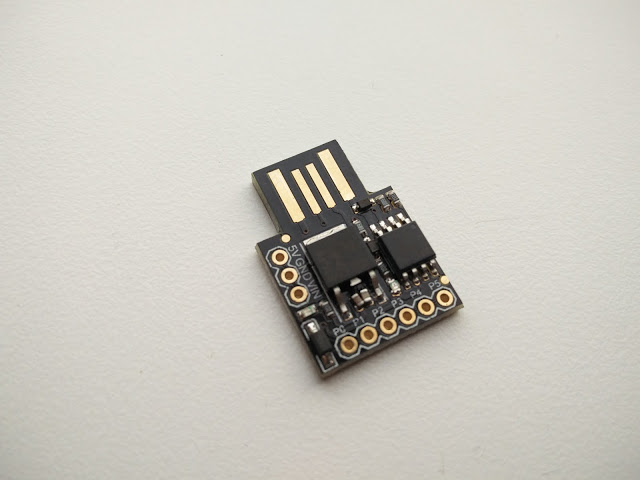
Well, Digispark is a new light weight micro-controller development board. Digispark comes with 6 GPIO pins, I2C and SPI serial communication and a USB interface. It also has 3 PWM pins which can be used to control l293d motor drivers or servo motors. we can use arduino IDE to program digispark but the way we upload the program is a little bit different than usual arduino.
The ATTiny 85 specs:8 Bit Data Bus20 MHz Max Clock Frequency ( w/ external crystal )8 kB Program Memory Size2.7 V to 5.5 V Operating Supply Voltage6 I/O Pins512 bytes of RAMPin outs:All pins can be used as Digital I/OPin 0 → I2C SDA, PWM (LED on Model B)Pin 1 → PWM (LED on Model A)Pin 2 → I2C SCK, AnalogPin 3 → Analog In (also used for USB+ when USB is in use)Pin 4 → PWM, Analog (also used for USB- when USB is in use)Pin 5 → Analog In
Get Started
Now lets install the drivers and upload the first sketch.
Go to this link and download the drivers.
https://github.com/digistump/DigistumpArduino/releases/download/1.6.7/Digistump.Drivers.zip
Extract it and install the drivers
Download arduino IDE if you dont have it.
Download it from:
https://www.arduino.cc/en/Main/Software
Install or Unzip the Arduino application.
Start arduino IDE and go to the “File” menu and select “Preferences”
Go to the “Tools” menu and then the “Board” submenu – select “Boards Manager” and then select “Contributed”. Select the “Digistump AVR Boards” package and click the “Install” button.
You will see the status there.
Once it completes, close the “Boards Manager” window and go to Tools→Boards and select “Digispark (Default – 16.5mhz)”.
The install is now complete!
void setup()
{pinMode(0, OUTPUT);
pinMode(1, OUTPUT);
}void loop()
{
digitalWrite(0, HIGH);
digitalWrite(1, HIGH);
delay(1000);
digitalWrite(0, LOW);
digitalWrite(1, LOW);
delay(1000);
}
This is a simple code to to test the working of the board. Just to blink the on board LED.
Unlike arduino, you don’t have to connect the board before clicking upload.Now click upload. The bottom status box will now ask you to connect in your Digispark – now connect the board.
You’ll see the upload progress and then it will immediately run your code on the Digispark.
If you disconnect Digispark and connect it back in or attach it to another power source there will be a delay of 5 seconds before the code run. This 5 second delay is the Digispark checking to see if you are trying to program it.
Stay tuned for more digispark projects.


![[Solved] Unable to locate package linux-headers | How to Install Kali 2020 Headers | Install Virtual Box](https://hackersgrid.com/wp-content/uploads/sites/5/2017/08/kali-wallpaper-2015-v1.1.0-1.jpg)


