Tripod Using Arduino and Servo Motors – 3 Legged Robot
While I was thinking about the next project, lots of things came to my mind. But this time, I thought of doing something new. Going through the scraps, I found 11 servo motors that I purchased for a project 4 years ago. Lets see, arduino, servo motor, servo motor driver, regulator. hmm… Why not something that could walk? So, I decided to get rid of all the wheels and make a 3 legged walking robot.
In this post, I will show you how to build a three legged robot (a tripod) using arduino and servo motors.
Materials Needed
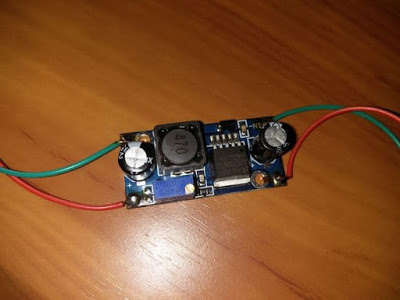
Voltage Regulator Module
For providing controlled and stable DC source for the working of servo motors as well as internal chips.
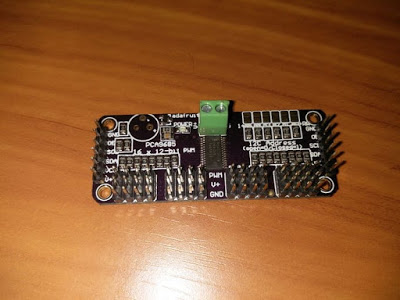
PCA9685 16 Channel 12 Bit PWM I2C-bus controlled Servo motor Driver
Now we need some thing to drive all the 9 servos. I am using adafruits PCA9685 16 Channel PWM Module. The PCA9685 is a 16 Channel 12 Bit PWM I2C-bus controlled Servo motor
Driver. The Driver can very easily connected to your arduino, Raspberry Pie and easily programmed to control single or multiple servo motors and make your own RC plane, car, ship, quadrapod, hexapod or anything you want.[AdSense-C]
To know how to control a servo motor using this driver, watch the video below.
Servo Motor
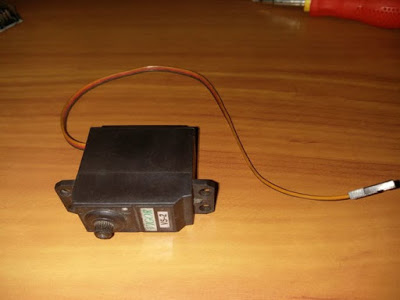
These are servo motors. They are widely used in the field of robotics due to its precise control of position, velocity and acceleration.
These servo motors can be combined together to provide multiples degrees of freedom. In this project, we are using 3 servo motors in each leg which gives us 3 degrees of freedom. So we need a total of 9 servo motors.
The Regulator
Arduino and servo motor that I am using needs a voltage between 5v and 6v. Since I am using a lithium polymer battery of 11 v, I will have to use regulator. The regulator I am using is LM 2596S 20083 adjustable voltage regulator. It is really easy to setup 1 yourself but If you dont know how to use, watch the below video tutorial in which i explained the usage of this regulator.
In the current project, I set the operating voltage to 5.5 V. Servo motors take too much current from the power source. If we are using a single regulator, it may overheat when multiple servo motors are running. So it is always a better idea to use multiple regulators in parallel in these cases.
The Body Parts and Designs
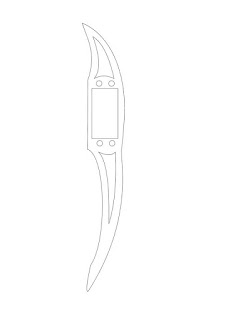
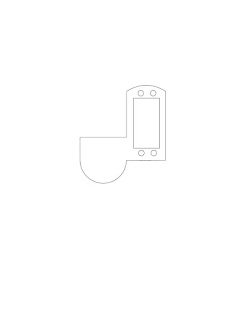
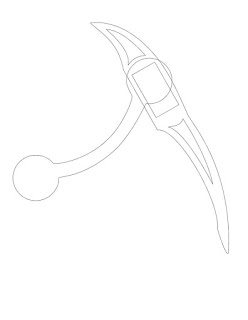
The material for the leg is acrylic sheet and the body is made of foam board. I designed these body parts in coral draw and got it laser cut from a nearby workshop. I will upload the layout here. Feel free to use it.
These are the different parts. For the base of the tripod, you can use any lightweight material. Here I had some foam board so I used it. you have to cut 3 holes to mount the
base servo motors. Clean the edges otherwise it be difficult for the servo motor to fit in.
Lets Start
It would be better if you can watch the video just below for clearly understanding what is going on.
Start by fixing all the servo motors in the body parts as shown in the video. Just fix it with some nuts and bolts and tighten all the connection so that it wont fall off or shake while the tripod is moving.
Use some strong glue and join 2 servo motors as shown in the video. Combining two servo motors like this will give us 2 degrees of freedom.
Connect the elbow part with the other joints. Connecting the elbow part with these 2 servo motor will give each arm of the tripod, a total of 3 degrees of freedom, which is more than enough to make it walk the way we want.
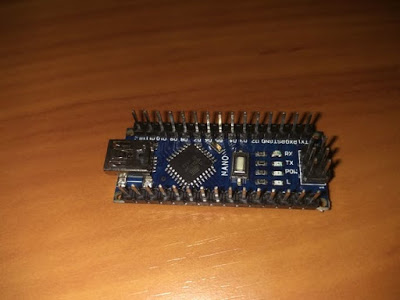
Now fix all the legs to the foam base as shown in the video. Fix the two regulators somewhere it wont be disturbed. I fixed these at the bottom of the foam board base. Attach it with screws and use hot glue gun so that all the connections will be secure. Fix the servo driver module in another piece of foam board and secure it with screws. Use double sided tape to fix the battery and foam board piece with the base of our tripod. Atlast, fix our arduino on the top foam board near the servo driver board.
All the Connections in this project are very easy. Just connect the battery to our regulator input and servo driver and Arduino to the regulator output. I will share the schematics and circuit diagrams soon.
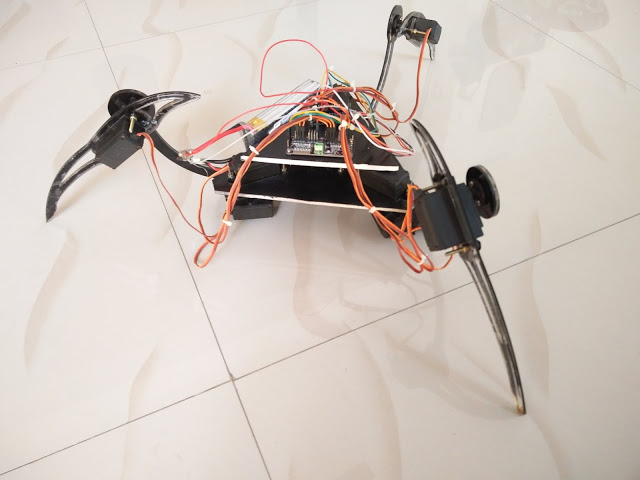
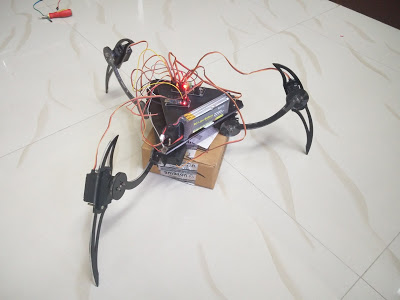
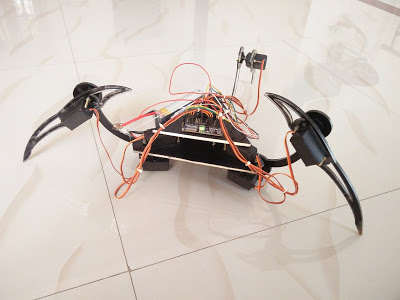
This is our tripod after all the connections.
It is a little bit messy. So lets clean it up. Use some zip-ties to organize all the wires.
Make sure that arduino and servo
driver are near to each other. otherwise, the connections will be little
bit hard.
Now its time to program our tripod. Connect the
arduino to our PC. Just go to device manager. and check the device port. Now open arduino IDE. Below is a sample sketch just to check all the motors functionality.[AdSense-A]
#include <Wire.h>
#include <Adafruit_PWMServoDriver.h>Adafruit_PWMServoDriver pwm = Adafruit_PWMServoDriver();
#define MIN_PULSE_WIDTH 650
#define MAX_PULSE_WIDTH 2350
#define DEFAULT_PULSE_WIDTH 1500
#define FREQUENCY 50uint8_t servonum = 0;
void setup()
{
Serial.begin(9600);
Serial.println(“16 channel Servo test!”);
pwm.begin();
pwm.setPWMFreq(FREQUENCY);pwm.setPWM(0, 0, pulseWidth(100));
delay(500);
pwm.setPWM(4, 0, pulseWidth(60));
delay(500);
pwm.setPWM(12, 0, pulseWidth(60));
delay(500);pwm.setPWM(1, 0, pulseWidth(10));
delay(500);
pwm.setPWM(5, 0, pulseWidth(170));
delay(500);
pwm.setPWM(13, 0, pulseWidth(170));
delay(500);pwm.setPWM(2, 0, pulseWidth(120));
delay(500);
pwm.setPWM(6,0 , pulseWidth(85));
delay(500);
pwm.setPWM(14, 0, pulseWidth(110));
delay(500);}
int pulseWidth(int angle)
{
int pulse_wide, analog_value;
pulse_wide = map(angle, 0, 180, MIN_PULSE_WIDTH, MAX_PULSE_WIDTH);
analog_value = int(float(pulse_wide) / 1000000 * FREQUENCY * 4096);
Serial.println(analog_value);
return analog_value;
}void loop() {
pwm.setPWM(0, 0, pulseWidth(150));
delay(1000);
pwm.setPWM(4, 0, pulseWidth(10));
delay(1000);pwm.setPWM(13, 0, pulseWidth(180));
delay(500);
pwm.setPWM(14, 0, pulseWidth(180));
delay(500);pwm.setPWM(1, 0, pulseWidth(0));
delay(500);
pwm.setPWM(5, 0, pulseWidth(180));
delay(500);pwm.setPWM(2, 0, pulseWidth(120));
delay(50);
pwm.setPWM(6,0 , pulseWidth(85));
delay(50);
pwm.setPWM(2, 0, pulseWidth(180));
delay(50);
pwm.setPWM(6,0 , pulseWidth(45));
delay(50);
pwm.setPWM(2, 0, pulseWidth(120));
delay(50);
pwm.setPWM(6,0 , pulseWidth(85));
delay(50);
pwm.setPWM(2, 0, pulseWidth(180));
delay(50);
pwm.setPWM(6,0 , pulseWidth(45));
delay(50);
pwm.setPWM(2, 0, pulseWidth(120));
delay(50);
pwm.setPWM(6,0 , pulseWidth(85));
delay(50);
pwm.setPWM(2, 0, pulseWidth(180));
delay(50);
pwm.setPWM(6,0 , pulseWidth(45));
delay(50);
pwm.setPWM(2, 0, pulseWidth(120));
delay(50);
pwm.setPWM(6,0 , pulseWidth(85));
delay(50);
pwm.setPWM(2, 0, pulseWidth(180));
delay(50);
pwm.setPWM(6,0 , pulseWidth(45));
delay(50);
pwm.setPWM(2, 0, pulseWidth(120));
delay(50);
pwm.setPWM(6,0 , pulseWidth(85));
delay(50);
pwm.setPWM(2, 0, pulseWidth(180));
delay(50);
pwm.setPWM(6,0 , pulseWidth(45));
delay(50);pwm.setPWM(14, 0, pulseWidth(110));
delay(1000);pwm.setPWM(0, 0, pulseWidth(50));
delay(1000);
pwm.setPWM(4, 0, pulseWidth(120));
delay(1000);pwm.setPWM(1, 0, pulseWidth(20));
delay(500);
pwm.setPWM(5, 0, pulseWidth(160));
delay(500);pwm.setPWM(0, 0, pulseWidth(100));
delay(500);
pwm.setPWM(4,0, pulseWidth(60));
delay(500);
}
This is just a simple code just to move the servo motors. Paste the code to Arduino IDE go to boards, Select correct COM port and Board and upload the sketch.
If the code is uploaded successfully, with in 15 Seconds, all the servo motor will start to move.
Congrats.. You have done it…
Now I am working on writing the codes for the tripod to walk, run, duck and some other complex movements and integrate various sensors into this tripod to fully automate it. Once I complete that, I will upload it here.
Stay Tuned for more…


Terrific work! This is the type of info that should be shared around the web. Shame on the search engines for not positioning this post higher! Come on over and visit my website . Thanks =)